What a nightmare! You’ve been bothered by a dripping noise all night, only to finally investigate the problem at 11 pm, right before bed, and find that you have a leaking kitchen tap!
To make matters worse, it’s leaking quite a lot, and you know if you leave it overnight until you can get a plumber to come out, then you run the risk of causing a mini-flood.
Luckily for you, the solution is easier than you could have ever imagined. There is no need to call out a plumber (at least not in most cases), and this is something you can fix yourself in a relatively short space of time with just a few handy tools.
Different types of tap
There are many different types of taps used in the kitchen, and in today’s article, we are going to be looking at two of the most commonly used tap types. These two tap types are the compression tap and the ball tap.
If you are unsure what type of tap yours is, you can ask someone with knowledge of plumbing or DIY. However, an easier way of establishing what type you have is by looking at the handles of the tap.
A compression tap, for example, has two separate handles. One that you turn for hot water, and one that you turn for cold water.
On the other hand, a ball tap has just one handle that is operated by a ball mechanism or joint. This joint can turn the water supply from hot to cold.
Compression tap
Step 1 – Identify the cause
The first step that you need to take is to identify the cause of your leaky tap. Now, it is likely that one of the handles has an issue that is causing the tap to leak. However, you also need to see where the leak is coming from.
Check the spout itself, or see if the leak is pooling from somewhere else. In most cases, it is likely to be the spout, and so that is what this article will be focusing on.
Step 2 – Removing the handles
For this step, there are several tools that you need and some things you need to keep in mind.
Before you begin:
- Ensure that you have turned off the hot and cold water supply underneath the sink.
- Plug the sink (it is also worth putting a clean, dry towel into the sink to stop you from losing any screws and small parts)
- Have some cleaning products handy, particularly white vinegar and a clean cloth or sponge.
What you need:
- Phillips head screwdriver
- Flathead screwdriver
- A wrench
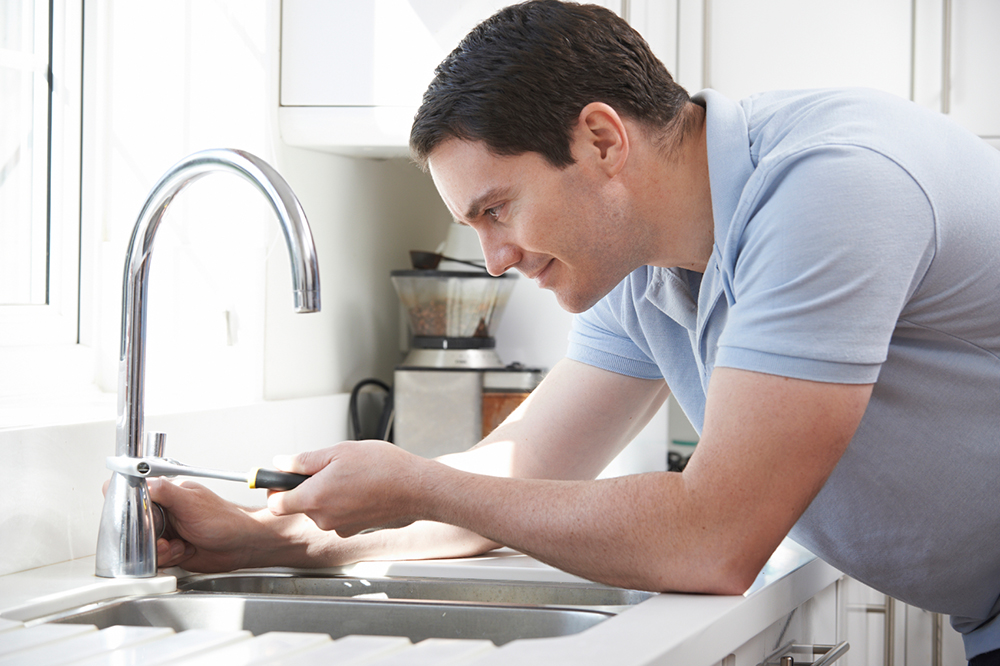
Simply take your flat head screwdriver and ease off the protective cap from each of the handles. These often have an H or C (to symbolise hot or cold) or maybe coloured red or blue.
When this is removed a screw will become visible. You can unscrew this with your Phillips head screwdriver. This will then allow you to remove the handle.
Step 3 – The nut
Now that the handle is off you should be able to see a nut. This is usually at the base of the main stem on which the handle is placed.
To remove this you will need your wrench to loosen it. You can then lift it off.
Step 4 – Removing the stem and checking the O-ring for damage
Now that the nut has been loosened, you can remove the stem. To do this you simply pull it out. It will then reveal the washer and O-ring.
The washer will always be thicker than the O-ring, which will help you to tell the difference between them. The washer is also usually held in place by a screw made of brass.
You now need to check both of these for any signs of wear and tear or damage. Pay close attention to the O-ring, as more often than not, this is usually the cause of a leaky tap. However, if the handle is leaking, then the problem may be with the washer.
Step 5 – Replace the part
You should now have identified whether the O-ring or washer is the cause of the issue. You may even feel that both of them are at fault.
Whatever the case, you need to replace whatever is causing the issue. Go to a local hardware store, or look online for a new O-ring, washer, or both. Ensure you note your old ones, or take them with you, to make sure you get the correct parts.
When you have obtained the replacements, before you assemble them, it is good practice to clean the area.
Underneath the handle rarely gets a chance for a deep clean, and so you can take advantage of this by using white vinegar and a clean cloth or sponge to remove any muck, debris, and hard water build-up.
When it is suitably clean and shiny, you can reassemble the handles by reversing the previous steps.
Ball tap
For this you will need:
- A flathead screwdriver
- A wrench
- Needle-nose pliers
- A pencil
- The correct ball replacement kit (this will come with any additional tools that we mention below)
- You should also ensure that, like the instructions for the last section, that the water is turned off and that the sink is plugged. You may even want to consider placing down a towel to catch any parts or screws.
Step 1 – Remove the cap
Like the compression tap, the ball tap will also feature a protective flat cap, perhaps bearing the logo of the manufacturer or with a half-red/half-blue covering.
You can edge this out with the flathead screwdriver.
Step 2 – Remove the handle
Now that you have removed the protective cap, you will be able to lift off the handle. To do this simply use your Allen key wrench from the ball kit and take out the screw that keeps the handle in place.
You can then take off the handle.
Step 3 – Remove the cap and collar
Next up, you will find a cap and collar underneath the handle. These are what hold the ball assembly in its place.
To remove them you should use a wrench to loosen them.
Step 4 – Take off the cam
Identify the plastic cam which is a round disc shape, with a centre that is shaped like the letter ‘D’. removing this can be done by using the tool supplied in your ball kit.
Place the tool on the indents of the cam and retrieve it.
Step 5 – Remove the ball, seals, and springs
Now that you have taken out the cam, you can go ahead and remove the ball assembly. This will lift out easily if the cam is removed.
Under the ball assembly, you will also find the seals and springs. These can be identified by looking for two O-rings. Use your needle nose pliers to remove both of them from the tap.
Step 6 – Replace the seals and springs
Now that you have cleared away the old seals and springs, you can put the new ones from the kit in their place. To do this, you may find it easier to put them on the end of a pencil as they are small and fiddly.
Be careful not to lose them down the drain (although this should not be an issue if you followed our earlier advice of plugging the drain and setting a towel down).
Step 7 – Replace the ball assembly and cam and then assemble the tap
Lastly, grab the rest of the parts supplied in your new kit and assemble the new ball assembly and cam, aligning them carefully so that they are straight.
You can then follow the first steps in reverse order to put the tap back on. Turn your water supply back on and enjoy leak-free water flow!
Final word
There you have it, our guide on how to fix a leaking kitchen tap on both a compression tap and ball tap. We bet that was far easier than you thought, right?
Remember, as easy as this all seems, if you are ever unsure, it is best to err on the side of caution and call in help from a professional. Always remember to turn off the water supply, and seek help if needed.
Thanks for reading!

